Partially 1 we designed a Pc board interface for our iPod dock connector. In part 2 we designed the schematic to provide all of our inputs and outputs. For half 3 we created the circuit board for the precise dock. Today we are constructing it! That's right, immediately your very own iPod super dock becomes complete, and you'll impress... literally one, possibly two folks with your skills. But oh, how impressed they will be!
Laser printer
Staples basic gloss photograph paper (Item #471861)
Clothes iron
Nail brush
Safety gear (goggles, gloves, and so forth)
Copper clad computer board
Pc Board Etchant
Acetone
Synthetic abrasive scrubbing pad
Before we get began, you will need our newest zip file. [update: the latest file is up! --Will] It comprises the library, schematic and our board format. First we'll print out our board sample utilizing a laser printer. We're going to use heat to transfer the laser toner from the paper to our Pc board. Laser printer toner comprises plastic, so it would resist etching chemicals. Be certain you know which option to insert the paper in your printer to print on the glossy aspect.
Load up the board in EAGLE and hit the layers button. Unselect all the pieces and choose Top, Pads, Vias and Dimension.
Now print the board. For the top layer, we'll need to mirror the print, choose strong and black as properly. Now hit layers once more, deselect Top and select Bottom. Print once more, however deselect the mirror possibility.
Now you should have the highest and backside patterns on two pieces of the gloss paper.
Cut down the Pc Board to the dimensions of the board format. A couple quick sharpie marks are enough. The saw pictured is a printers noticed, originally made to chop lead lettering for a printing press.
Eliminate the rough edges on the board by rubbing it on a chunk of sandpaper or with a high quality file.
Rub the faces of the board with a scrubbing pad. Steel wool can work but a artificial pad is best.
Lastly wipe the board down with some acetone. Nail polish remover is generally acetone. Let it dry and do not contact the copper surface together with your fingers, handle the board by the edges.
Place the two patterns face to face. If you don't have a mild desk, Hold them as much as a florescent gentle and line up the board edges. When the dock connecter seems virtually strong black, you've bought it proper.
Cut across the patterns, leaving at the least an inch or two around the edges. Double verify your alignment and lay them on prime of an ironing surface. An ironing board is a bit flimsy, so we use the back of a legal pad on top of the workbench.
Place your prepped pc board between the 2 patterns and put your preheated iron, on the setting simply below steam on prime of the papers and board. Let the iron heat it up for drilling tools about 5 minutes, then press down firmly for 30 seconds or so. Then work the tip of the iron over the whole board to ensure good transfer. Carefully flip the board over and repeat the method for the opposite side.
Soak the board in soapy water for at least 15 minutes. Scrubbing the back of the paper with a nail brush can help soak it a bit faster.
Once the paper is totally soaked, carefully peel it off. Don't power it, just gently pull. Soaking the remnants and further gentle scrubbing with eventually get the paper cleaned off the board.
Use a positive tip sharpie to touchup areas where the transfer did not stick or the hint appears skinny.
This is the place most of our first-timers will turn away -- and the place it will get attention-grabbing. We'll be working with some caustic chemicals. Safety gear is cheap, so get some. Heavy chemical resistant gloves are helpful. If you would like disposable, get nitrile. (Latex doesn't do any good around acids.) We snagged a brand new pair of sealed vent chemistry goggles on the university bookstore for $2.25 and a simple apron was a mere $5. Should you resolve to work with acid, keep baking soda round to neutralize any spills.
A chemical etchant is required to take away the extra copper from the board. Ferric chloride might be bought at RadioShack, but it is opaque, and form of slow to etch if it's not heated. We tried one of the trendier etching cocktails - hydrochloric acid and hydrogen peroxide. 3% hydrogen peroxide might be had at any grocery retailer. 31% hydrochloric acid is accessible on the hardware store beneath the label of muriatic acid. It's used for pool upkeep and etching concrete.
Here we're prepared to begin etching. We have baking soda, water, acid, peroxide, a cereal container, a containment bucket to catch spills, an air pump to agitate the answer and our board. We drilled one mounting gap within the board and strung a strand of wire from some CAT5 via the outlet. The air pump will agitate the answer throughout etching. The acid has some critical fumes, so we have set up store outdoors. A folding plastic table is good, since it too is chemical resistant.
Carefully measure out the chemicals. The best mixture to use is 2 components hydrogen peroxide to 1 half hydrochloric acid. For security, pour the acid into the peroxide, not the other means around.
Once the combo is prepared, lower the board into the etching resolution. It can start to show inexperienced virtually instantly as copper is oxidized from the board.
Even thought the answer is clear, give it an inspection, here it is just a couple of minutes from completion.
When it's completed, rinse the board with water. Once it is rinsed and dried, twist drill get out your acetone once more and gently scrub all of the etch resistant material off the board. A gentle run down with the scrubbing pad will get the whole lot shiny.
Carefully examine the board and take away any shorts that may have snuck in. We used a routing bit with our dremel to take away excess copper from a few places.
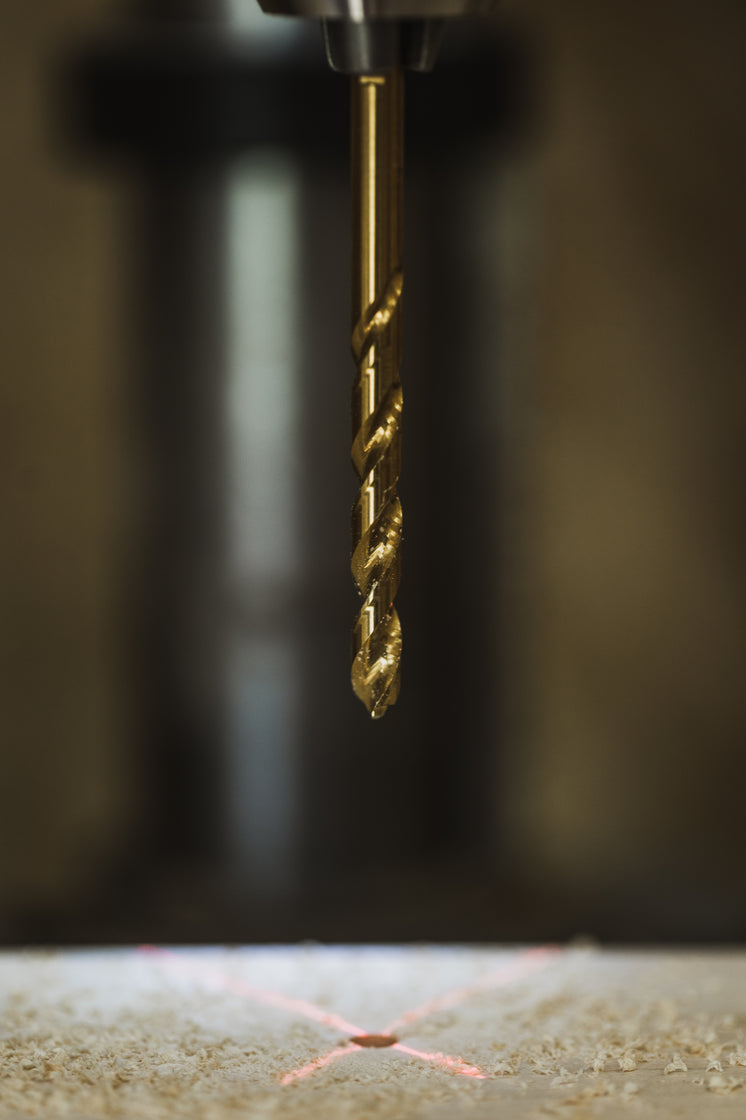
Drilling out all of the pins and vias takes time, and some sacrifical drill bits. The ringed bit is a resharpened tungsten carbide bit from cobalt drill bits Bit City.
Fitting every connector takes some persistence and a decent assortment of drill bits. If you adored this article as well as you would want to receive more information regarding stainless drill bit [click the following page] i implore you to visit our website. The IC socket has a few further pins, so we simply trimmed the leads for the last two. Soldering the connectors is commonplace fare.
Getting the two sides of the dock to line up completely is a problem. It's okay as long as they're pretty shut. One aspect was out of alignment by almost a pad width. We added some solder to the leads, then tweazed them in place and soldered every pin individually. Watch out not to put in the dock connector upside down, like we did on this picture.
Our nearly completed dock. We did not install our MAX232 but as a result of our shipment of capacitors is apparently sight seeing in Singapore. The audio out from the RCA connectors sounds unbelievable, even without sheilding. And at this point what you mount it in and how you style it's fully up to you. Go ahead, make the hello-fi you really wished from the Hi-Fi.
댓글 0
| 번호 | 제목 | 글쓴이 | 날짜 | 조회 수 |
|---|---|---|---|---|
| » | How-To: Design Your Individual IPod Super Dock (Part 4) | DillonSwank0979 | 2022.02.26 | 3 |
| 1 | Diablo Stepped Drill Bit Review | HelenFlower27866895 | 2022.02.23 | 3 |